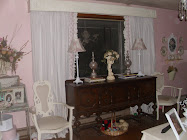
This is my lamp. I've posted about this lamp before. It was a gift from a dear, sweet friend. She told me the shade was not original to the lamp (which I took to mean I had permission to change it). The shape and size were perfect for the lamp. Which brings me to after #1. I did attempt to change the shade. I liked the pattern on the shade but even after I had finished with it....I wasn't really happy with it. Better, but not there yet. Something was not right!
 Which brings me to After #2. Much better. I did have issues with this project. I purchased scrap booking paper from Hobby Lobby. I brought it home and wanted to just glue it straight to the shade. Well, it didn't exactly work. The shade is not exactly round. Which left me with a cone shape. I did have to sit and think about what I was going to do!!!
 I finally figured out I could cut strips of paper and layer one on top of the other! I think it worked out really well. The paper matches the base perfectly!!! An updated version of an antique lamp for 59cents. Not bad!!! The scrap booking papers were 1/2 off and I used white glue to attach the strips!!!!
Not a bad project....the second time around!
 Which brings me to after #1. I did attempt to change the shade. I liked the pattern on the shade but even after I had finished with it....I wasn't really happy with it. Better, but not there yet. Something was not right!
 Which brings me to After #2. Much better. I did have issues with this project. I purchased scrap booking paper from Hobby Lobby. I brought it home and wanted to just glue it straight to the shade. Well, it didn't exactly work. The shade is not exactly round. Which left me with a cone shape. I did have to sit and think about what I was going to do!!!
 I finally figured out I could cut strips of paper and layer one on top of the other! I think it worked out really well. The paper matches the base perfectly!!! An updated version of an antique lamp for 59cents. Not bad!!! The scrap booking papers were 1/2 off and I used white glue to attach the strips!!!!
Not a bad project....the second time around!



.gif)


